Intro
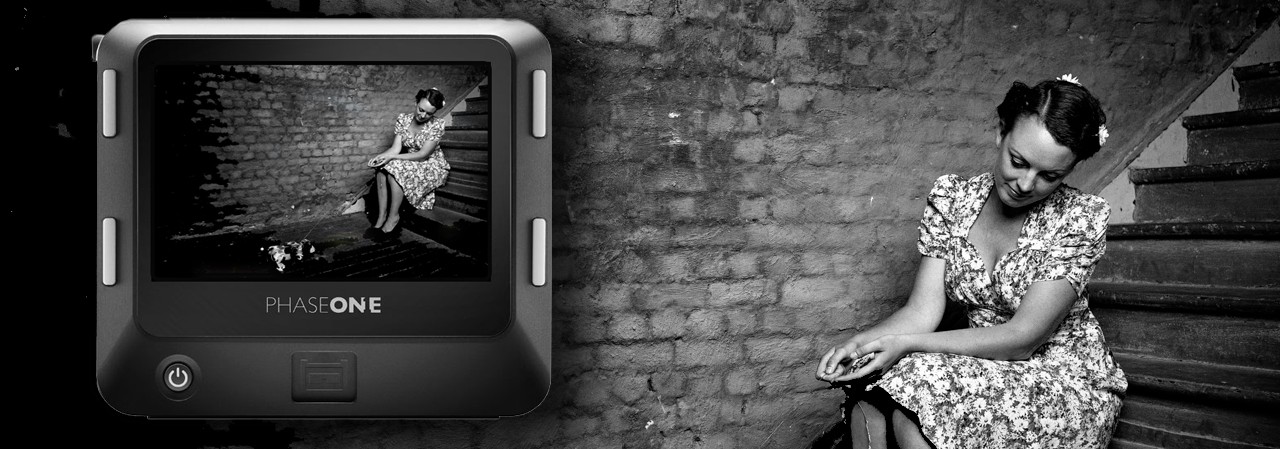
If there was no Light then there was no photography. Light is a fundamental element of every picture, where as quality light is the basis of every successful picture. Whether it comes as natural light, strobe light or a combination of both, the principles remain the same. It is important to recognize, learn and “see” light, use it, and make better pictures.
Recognizing light.
Some of us just have the gift to see quality light, others don’t. However I am convinced that we can all learn to analyze and control the light. The first thing one needs to learn is to recognize quality light.
What is quality light? Well, the light on a summer day at sunrise and sunset is far more beautiful than when the sun peaks high on sky at noon.
You probably also know that light from a north facing window creates flattering portraits; A light source that inspired many historical painters. No wonder that most photography books and manuals talk about Rembrandt light.
But there is much more to discover, quality light comes in so many forms and ways. Quality light relates directly to the subject. And what is a flattering quality light for one subject or object can be revolting for another.
Females look glamourized with soft light, where as the wrestler will be at his best with hard light.
What I am trying to say is that quality light is relational to the environment, mood and subject. What works in one situation, might not work in another.
Perhaps the sun casts a fantastic well-defined shadow pattern on the wall at high noon, the perfect time for an architectural shot. At the beauty saloon, you look a decade younger even without that make-up. During a romantic diner, candlelight conjures seductive lights in the eyes of the partner.
In all these situations, the light sources are all of a different nature, and yet they work for that specific capture.
Analyzing light.
Recognizing quality light creates options for the photographer, especially when he or she knows on how to apply the light. What works and what not for a given situation.
Natural light is not directly controllable, this dependency can be frustrating and time consuming. Often the shoot is so tempting that the very basic principles are ignored, and people go shoot at high noon. It is only afterwards that they find out that the light was of such poor quality, that it created raccoon eyes. A late afternoon or early morning might have worked so much better, or maybe even an overcast day.
Therefore you may want to start looking for ways to control the light and create it (artificial light). But before attempting to do so, one must first understand which light works best in a specific situation.
Often this first step is skipped and people plunge immediately into complex light set-ups. The result is in most cases poor and not what was expected from the shoot. No matter how good the models are, if the light is wrong the image will not work.
Light analysis an interesting addiction
Light analysis may seem a boring technical activity, but it is crucial. I found it addictive, especially once I started to understand the effect it has on the overall tone and mood of the picture.

There are no rules in photography.
Wrong, photography is all about the rules and laws of physics. Those that claim that there are “no rules” in photography have certainly missed something in their education, to often that argument is used for a bad picture, or even worse they call it “art”. Never the less reality is that photography is subject to the laws of physics and those cannot be ignored or avoided.
Of course it is up to the photographer to decide on how he/she will apply those rules, and in that context one could state that there are no rules.
The Laws of physics
Don’t get scared, there are only a handful of basic laws, and once those are understood, one can handle almost all situations.
-
Light always follows a straight line.
If your subject cannot see a specific light source, then light of this source will not illuminate the subject.
This law is particularly important to figure out where the shadows will be casted.
-
The angle of incidence equals the angle of reflection.
When light hits a reflective surface under a certain angle, then the light will be reflected by the surface on an identical opposite angle. You can perfectly predict in which direction it will reflect. Think of it as a game of billiards.
Experiment with a flashlight and a mirror. Keep the lamp in different angles in front of the mirror, and learn to predict the direction in which the light will reflect.
-
Light takes the color of what it touches.
This is the reason why people have an unhealthy tan if you let the flash bounce of a green ceiling, or any other color (except white and shades of gray) .
It is also the reason why people laying in the grass get a Hulk tan, light reflects of the green grass.
-
The surface dimension of the light source is relative to the subject size and determines the softness of the light.
Soft light creates flattering portraits. The larger the surface of a light source, the softer the light.
The sun is the largest source in the solar system, but still provides hard light with hard shadows. Confusing? Not really, because the distance to the sun is so immense that the sun is still a relatively small light source.
Don’t worry; we will talk more on soft-, hard and diffuse light in this write-up.
-
The inverse-square law.
In physics, an inverse-square law is a physical law stating that a specified physical quantity or intensity is inversely proportional to the square of the distance from the source of that physical quantity.
In practice, if the distance between the subject and light source is doubled, then the intensity of the light that illuminates the subject is four times less. (22)
Imagine the following:
You need to shoot a couple. The woman stands one meter away of the flash, the man stands two meters (double the distance) away. You would think that the man then receives half as much light as the woman? Not so , by the inverse-square law, he receives only one-fourth of the amount of light.
Remember in particular that the light intensity decreases very rapidly as the distance between the light source and the subject becomes greater.
Light is defined by five parameters .
Light comes in basically 3 forms, hard, soft and diffused each with it’s very specific characteristics. However all can be defined by five parameters
Those characteristics can be defined as:
- Coverage
- Edge-transfer
- Shadow definition
- Shadow contrast
- Highlights
Each of the above parameters will have a unique signature for either soft , hard or diffuse light.
Sounds complex, but it is simple;

Imagine a bright sunny day, at noon the sun is high on the sky. Not the most pleasant light condition to take pictures. Shadows are dark and reveal little to no detail, highlights are bright, the colors are vivid and there is a lot of contrast. In fact it is difficult to make a picture and still capture all the details in the shadows and highlights. Unless, you have a camera with a high dynamic range (14 or so). Photographing people under these light conditions results most of the time in raccoon eyes. The high sun cast deep shadows from the eyebrows and eyelids under the eye like a mask.
Making the same pictures at sunset or sunrise is so different; shadows are less dark and deep, less defined. Colors are far less vivid and contract is low.
The next day it’s overcast, gray clouds fill the sky as one big soft box. Making the same pictures all-over again will result in low contrast, dull colors and flatness.
The perception of depth in a picture is created by the presence and or absence of light and shadows. Overall shadows create a feeling of depth.
Hence, light can be described with five parameters.
1. Coverage:
The coverage of a light source identifies how the light is distributed. Even, there is no difference of the light intensity amongst the surface of the light source. A big soft box is a typical example of an equal lit light source surface.
Center weighted, the light intensity tends to be centered, where as the edges are less intense. A reflector with a honeycomb creates Center weighted light.
Linear graduated, the light intensity gradual increases or decreases from edge to edge. A strip box creates linear graduated light.
The sun on a clear day in the previous example is a typical Center weighted Light source. Where as the sun on a heavy overcast day (lots of gray and thick clouds) is more an even light source.
2. Edge transfer:
Defines how the edge (lit and not lit zone) of a light bundle behaves.
Very Sharp; The light bundle has a very sharp and abrupt edge between the lit and the none lit zone. A snoot or spotlight is a practical example
Quite sharp; the edge is less abrupt then before, however the transfer area is still very narrow. Reflectors with a honeycomb grid produce Quite Sharp light
Soft; The edge is a gradual migration from the lit to the none lit zone. Soft boxes produce Soft light, hence the name soft box
Non – existent; there is no edge and light is all-over the place. A light bulb produces no edges.
3. Shadow definition:
Defines how much detail can be observed in the shadows.
Hard light produces lots of details in the shadows, whereas soft light has little to no details. Diffuse light has no shadows at all.
4. Shadow contrast:
Defines how much shadows are produced by a specific light source.
A large studio (or studio with black walls) will always produce lots of dark shadows, as the light cannot bounces of the walls. In a small studio or room with brightly painted walls, light will reflect of those surfaces and produce a low shadow contrast (very light shadows). Large Soft boxes or balloons produce in a large studio or dark studio less dark shadows then reflector based sources. The inverse law provides the possibility to control the shadows. The closer the light source to the object, the faster the light falls off after hitting it. And will produce dark shadows. If the light source is moved away further from the subject then the shadow contrast will decrease, as the surrounding walls will bounce back the light.
5. Highlights:
In general we can state that the highlights are very small entities in a picture and most of the time burned out. In order words; very bright small area’s without detail. Depending on the light source those highlights will take often the form of the light source. For example the use of a square or round soft box will reflect in the eyes of a model and will be burned out : Add picture of para 220.
Pictures without highlights are dull and flat, the lack of highlights is most seen under defuse light.
The inverse law in practice:
We have introduced the inverse law at beginning of this article, this law states that:
“The intensity of light falls off with the square of the distance”
Here is a practical example:
-At twice the distance , the light intensity is 2×2=4 times less
-At three times the distance, the light intensity is 3×3=9 times less
-At four times the distance, the light intensity is 4×4=16 times less
If we move a light away from 2 meters to 10meters, then that is 10m/2m=5 times further. And the light will be 5×5=25 times less intense or about 4,5 stops less.
The mathematical rule is correct, but only if the light source has a pointed form like a light bulb, as light radiates in all directions.
If the light source bundles the light through lenses, like a Fresnel, a grid or parabolic light shapers then the fall off is far less.
Bundled and directed (parallel) Light stays constant over a longer distance.
This is all hunky-dory, but what does it mean in practice?
Working in a small studio with bright walls, is an issue if dark shadows and backgrounds are desired. But now that you understand the inverse law, you can apply it in practice.
Imagine that you want the background to be dark, although the wall is white. We all know that moving a light source far away from the model will result in an almost equal light on all walls and no dark background can be created. However moving the light source close to the model will result in a darker background. The closer you move the light to the model the darker the background will be.

That is the invers law in practice.
Lets apply the law and see if it works:
Assuming that the model is properly lit with a light source at 4 meters from the model and the background is 4 meters behind the model, then the background is twice as far away from the light source then the model (8m/4m=2).
The light that hits the wall is 2×2=4 times less intense (inverse law).
- Assuming that the model is properly lit with a light source at 16 meters from the model and the background is 4 meters behind the model, then the background is 1,25 times farther away from the light source then the model (20m/16m=1,25).
The light that hits the wall is 1,25×1,25= 1,5 times less intense (inverse law).
- Assuming that the model is properly lit with a light source at 1 meter from the model and the background is 4 meters behind the model, then the background is 5 times farther away from the light source then the model (5m/1m).
The light that hits the wall is 5×5=25 times less intense (inverse law).
Conclusion: The closer the light to the model, the more control on shadows as the fall-off is much larger and even a white background turns black.
More on Highlights
Direct and diffused reflections:
Sounds like a difficult topic but it is not.
Direct reflections are caused by very smooth and reflective surfaces, for instance the mirror on the wall, a water drop, a silver plate, chrome, glass and even the eyes. All those surfaces have the tendency to bounce back the light, and that light reflection has the same intensity as the actual source. A good is example is a mirror, placing a softbox in front of a mirror at two meters or 20 meters will always reflect the light with the same brightness as the light source. The reflection of the soft box in the mirror will not get more or less bright by moving the soft box further or closer to the mirror. The only thing that will change is the size of that reflection but not the intensity or brightness.
Diffused reflection occur on surfaces like wood, matt skin, certain textiles, stones etc.. However the intensity of the reflection is much less then actual light source, and will increase or decrease with the inverse square law.
But what does this all mean and how can we make use of this phoneme?
Imagine that you need to take a picture of a model with a silk dress, sunglasses, silver and diamond jewelry. The customer insists that the picture needs to be full-body and it has to sparkle. The dress, the model and the jewelry, it all needs to shine and emit freshness and liveliness
- The dress, glasses and jewelry are all direct reflective materials, meaning that it will reflect the light at the same brightness as the source. You might even want to apply some oil or water drops to the skin of the model.
- Placing a soft box at a long distance for the model will require a high power setting of the soft box for a correct exposure. However by doing so, the direct reflections will be very bright and small (as the soft box is far away). It will create that sparkle that your client was looking for, in the skin; dress, jewelry and glasses…as it were small twinkling stars.
The opposite could also have been requested, the same model but now the skin has to be smooth and matt, the glasses transparent…. with little to no direct reflections in the jewelry.
- Placing the soft box closer to the model, allows the power setting of the soft box to be reduced (inverse square law). Hence, direct reflections are far less bright then if the soft box was at a longer distance. It makes the glasses transparent, and the skin smooth and matt.

This principle works on all images.
Imagine that you need to make a pack shot of an aluminum hair lack canister.
The canister is a high reflective surface, where as the text is not. Creating depth and accentuating the shape of the canister is done through highlights and shadows. But at the same time the letters need to remain visible
Placing a strip box along one side of the object is the perfect light shaper. At a long distance, the strip box will create a small and intense reflection, whereby the letters in the reflective area are almost invisible. Moving the strip box up close, allows a reduction in power. Hence, the intensity of the direct reflection is reduced and the letters are readable. Of course the direct reflected area is now larger…. This can be fixed with a narrower strip box.
After all these theoretical highlights, we should not forget that the most important tool is the eye, and the photographers gut feeling.
